Hey friends! I thought a good way to start the beauty posts in my blog is to write about the things I have learned while building my own makeup collection. I don't want to say "collection" really because I am honestly not trying to hoard makeup and snatch up all I can. I really only try to buy what I need and what I know I will use. Basically, the essentials with a dash of splurges. I work hard for my money and I have loans to pay off, so I want my pennies to stretch as far as they can. I also absolutely hate wasting stuff. I think it's such a shame when I end up having to toss something out, which is one of the biggest reasons why, as mentioned in my previous entry, I decided to write about a lot of things I already own instead of going out to get more stuff. It's actually been a very good way of rediscovering some products I have and using them again.
So on to makeup!
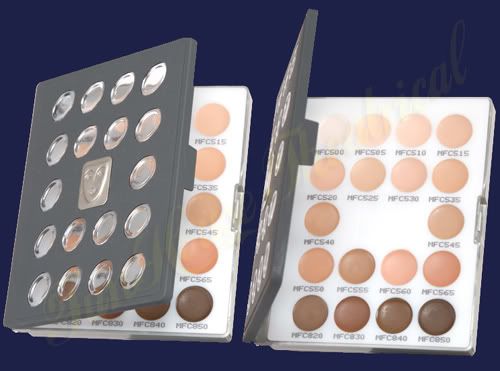
Foundation and ConcealerThe cornerstones of makeup. Foundation and concealer, in my opinion, is the hardest thing to get right. First of all, you have to find something that matches your exact skin tone for that flawless look. And then you gotta figure out what type of skin you have - dry, combo, oily normal... (what the hell does all that mean anyway?) And you have to decide what kind of foundation - liquid, powder, stick, squishy that turns into powder, etc. Sensitive skin? No sensitive skin? Brands, coverage, drug store, non-drug store, what's worth my money...!!!!!!! It gets kinda overwhelming. I admit that I haven't figured out foundation and concealer for myself yet. I currently use Make Up For Ever's HD foundation in 120, but I don't use it on my face every day because I don't think I need it every day. I've tried numerous concealers, but there's always something about each one I don't like so I try another one. Right now I am using Laura Mercier's under eye concealer, e.l.f's tone correcting concealer, and Amazing concealer. Obviously, I'm still experimenting. I'm currently in search of something I can throw on faster in the morning with decent coverage and reasonable price. However, speaking of price, if you're going to spend money anywhere, I would spend it on foundation and/or concealer. Think about it, this is something you're putting on your entire face and the very canvas on which all your other makeup is going to go on top of. Evening out your skin tone and hiding those little imperfections makes the biggest difference in your overall look. If you master the flawless face, you don't really need to put on anything else.
So how do we get the flawless face? It's a lot of hit or miss and experimenting. To start, I recommend going to Sephora or Ulta or even your local department store, anywhere that carries several brands, and ask the makeup artist for recommendations and to try them on your skin. Tell them your skin type, your morning routine, anything that will help them find the right type of foundation for you. The same goes with concealer. They will help match you up with one. Always ask if your purchase is returnable because you might like the product while you're in the store, but you might not like it when you go home and try it out for yourself. I know you can return anything to Sephora. If you feel like experimenting and trying drug store brand foundations that you often can't try at the store, CVS takes returns on makeup. I'm not sure about Walgreens, Rite Aid, or other drug stores. Let me know if they do! Don't be shy to return products! It's your money and there's no point keeping something you don't like and won't use! You can always play around with samples yourself to see which kind you like the most. Rub a little on your cheek close to the jaw bone. Whatever shade disappears into your skin is your match.
EyeshadowI always end up spending a little more on eyeshadow because the quality varies so much between brands. I haven't found any drug store brand eyeshadow that I really love, and I tried just about all the brands. I hear the L'Oreal Hip line is pretty good with their eyeshadows and the Milani ones are decent too, but I had already threw in the towel and went to pricier brands by the time I found out. I usually get palettes because you get multiple colors and they're usually a bigger bang for your buck than buying individual shadows. They're also great for experimenting with colors. A great thing to start out with is the Coastal Scents 88 palette (available at coastalscents.com) or something similar because you literally get every color at a great quality and at a reasonable price ($18.95!) You would spend so much more for all those colors even at the drug store. I wish I had found that palette before I started to purchase shadows. Palettes are also better for travel. You stick that baby in your travel bag and you have all you need to create a billion different looks!
Some brands that I recommend for shadows are Urban Decay, Smashbox, Victoria's Secret (Individual shadows. Their Heidi Klum palette is great but the others suck), MAC (again, mostly individual shadows but you can catch some palettes), and Lorac. Those are the brands I use the most. The shadows I've tried all have come from palettes.
EyebrowsGetting something to fill your eyebrows is very important. I used to think brows were whatever, but filling them in and grooming them really makes a difference. Your brows frame your face and eyes. I never spent a lot on my brows. I have a pair of Revlon tweezers to clean up the hairs and a L'Oreal brow pencil to fill them in. I recently discovered a MAC eyeshadow in a palette I own that works great for my brows. Whatever works to shade in your brows is fine. You want something two shades lighter than your hair color if you have dark hair and something two shades darker if you have light hair. It doesn't have to to be brow specific. You might want to invest in brow gel or even just some clear mascara if you got more gnarly brows to keep the hairs in place.
LashesMascaras can vary in quality from brand to brand. However, most of the time, the drug store brands are just as good as the expensive stuff. Covergirl's Lash Blast is an awesome mascara. Before that, I was using an Estee Lauder one, and I think the Covergirl is better. The price difference is about $10. So you can save money on mascara. I definitely recommend getting a good eyelash curler, and these can vary in quality. I used to think eyelash curlers were pointless, but it was because I was using a crappy Revlon one. I got one in a brush set I got from Costco a while ago, and holy bananas!, did it make a difference. Curling your lashes opens up your eyes so they look bigger, especially after a coat of mascara. So yes, get a decent eyelash curler. The Shu Uemura is supposed to be the holy grail of eyelash curlers, but I don't think you need to spend $20 on an eyelash curler to get good results.
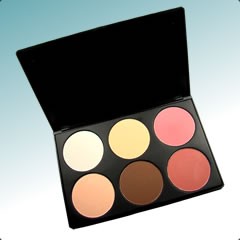
CheeksBlush is something you can save on. I don't think there is a major difference between different brands of blushes. Whatever you get that give you a nice rosy glow is good. Same goes for bronzers. I have a Revlon blush that works just as well as a NARS blush I own.
LipsYou can also save on your lips. Lip glosses and lip sticks don't really vary in quality. You end up reapplying them all the time anyway. I usually don't spend much on lip color. You're really only paying for the brand or the packaging with lip products.
NailsThere is a difference between brands. OPI is simply the best. Best colors and they last the longest. NYC chips after a day. Other drugstore brands are decent. I'm very picky about how the polish goes on and everything since I'm OCD. I only buy OPI now because I LOVE it and it's only a a buck or two more than some of the drug store brands anyway, so it's worth it to me. Some people are less picky about their nails.
BrushesGetting good brushes is extremely important for your makeup kit, but you don't have to spend a ton of money to get decent brushes. I don't own any pricey brushes, and I am still able to achieve great looks. It's really whatever tool you find that works for you. Brushes don't make the artist. Although they help, it's the hand behind the brush that matters. So practice with what you have before you go out and get expensive brushes. Also, try not to fall into labels. What I mean by that is a concealer brush doesn't necessarily have to be used for concealer or a shadow brush doesn't have to be used for eyeshadow. Look at your tool and think of anything it can be used for. I use a small concealer brush for my mineral shadows simply because the bristles are synthetic and they press on the shadow better on my eyes. I use a buffing powder brush to apply my liquid foundation. Use whatever works for you with whatever product you have. Again, you might have to do some experimenting.
Am I missing anything? I hope this helps some of you. Questions, comments, and your tips are always welcome! Remember that you're going to experiment with some things and you will need practice, practice, practice as with getting good at anything else. I am still practicing and experimenting myself! Don't worry, we'll figure this out :)


.JPG)